Showing posts with label Pots. Show all posts

Tuesday, 28 May 2019

Some things are meant to be

A couple of year ago I experimented with hypertufa, making a couple of test pots.  They were nothing special at the time, but slowly moss started to grow on them and they have turned into much more natural pots.  I have been looking for something to go in them and was surprised to find a little agave filifera at the local garden center.  They are just made for each other.


The agave has a certain compacta look to it, which would be great.  Sadly it is probably just a young plant, so will need some sort of intervention to keep it small. Either way for the next couple of years it is going to be put somewhere to be admired.

Friday, 29 March 2019

Another ceramic pot experiment

I am sure many of us are constantly on the look out for unusal plant pots for our succulents. Back in January, just happened to pop into a shop and found this one.


It really reminded me of a clump of sea anemones.

Back home and time to think what to plant in it. The planting holes are not large, and potting was going to be difficult. So slow growing and perhaps something that could just be planted and left to get on with it. Mulling over ideas my pot of deuterocohnia brevifolia came to mind. This little bromilaid, also known as Abromeitiella brevifolia f. chlorantha, forms nice mounds over time. My pot had put on a growth spurt over last summer and was looking good.


Wouldn't it be amazing to have each hole planted with these; over time they would envelop the pot forming a multitude of little mounds.  I considered splitting mine, but it was too perfect, so one project led to another and a second pot was purchases.


Doesn't it look good in its new home, It is bigger than it looks, the pot is 22cm.  

Now just the problem of finding another plant with enough heads to fill the 20 holes.  It took a while to track down a large enough plant, and it arrived yesterday.  It was straight down to seeing how many plants with roots it could be split into.


6 good plants straight away. A few more delicate splits, some with roots and some without, resulted in 14 plants.  Next job to decide which holes to fill.  I though it would look better initially to leave some empty, to allow watering and to give something different while the plants establish.


It took quite a few attempts to settle on this one. Then time to fill it, and the realisation that this was a really stupid idea. The holes were between 1 - 2cm and with a plant, many with root, getting soil in was going to be difficult.  How any times in succulent gardening do we use unusual tools.  Todays a teaspoon.


It took about 30 minutes to spoon the soil mix into the holes, shaking the whole thing to get it spred evening through the pot.  Another 15 minutes to top it up around the plants.   The the real fun started; how to get the gravel around the base of each plant.  I tried the teaspoon, my hand and finally resorted to a pair of tweezers and placing 2 or 3 small pieces of gravel at a time.  Yep 1.5 hours later and the pot was finished!


Should be fun as it fills out, initially forming individual mounds and then as these join together into one amorphous blob. It was a lot more work than expected, but should be worth it.

Wednesday, 8 August 2018

Wednesday Vignette

Finally got around to planting up my Tonka truck.  I went back and forth over which plant to use; somethin structural, something colourful, something that will take over. In the end I settled on orostachys spinosa, which will spread out over the surfaces.  I like the way it looks like the truck is now full of  rubble.


Wednesday, 25 July 2018

Some potted things

The succulent rockeries have greatly reduced the number of plants in pots (down from over 400), but there are still one or two that can't be planted. I have been slowly building a set of nicer pots and some of these have even been left to get on with it, instead of plants being moved every year.

This little echeveria minima is stubbornly refusing to offset. Instead it just continued to grow into little towers


The problem with these really small pots, is stopping them drying out. I am tempted to start again with this one, in the hope of getting a more lush clump of plants.

Others have been more successful. The abromeitiella chlorantha is starting to fill the pot.  It dried out a bit over winter, but has come back, with only a few brown leaf tips now. 


Winter watering is obviously a problem. Getting the right balance between die-back and elongated winter growth needs to be improved.  This echeveria cuspidata var zaragoza is great, it just needs to offset a bit more to properly fill the pot.


The sedeveria letiza loves its new pot. It has got a bit leggy in places and while there are smaller heads coming through,  it is starting to show gaps.


The agave albopilosa continues to grow. A few of the terminal spines are starting to turn fluffy. It seems as happy outside as in the green house over the summer.


It is funny to think that these were new a few years ago, there have been some great photos of peoples plants, all seed grown and getting to a decent size.

One of my favourite agaves is A. FO-076 (the old agave titanota).  My compact form is really toothy now.


It has a very similar look to my supposedly variegated mediopicta form, which saldy has lost any sign of variegation.


I have tried it in sun, shade and in the greenhouse. I know that with some plants the variegation varies depending on light levels. Thankfully so far no signs of my normally variegated plant going plane green.


It stopped growing for a while, each time there is an offset, but now seems to be growing at the usual titanota rate.

Most of the variegated agaves seems to be coping fine with the sunny summer we are having.  The pot of variegated agave filifera. This is a large bowl, and they are doing their best to fill it.


The agave bracteosa monterrey frost seems more keen on offseting than growing.  In full sun (Uk sun that is) the plant is a paler green, compared to those in dappled shade.


I was looking through old photos the other day, and noticed how much the agave parasana fireball has grown.  Parasanas are one of my favourite agaves, so structural.


The other more inetesrting variegated agave is the A gypsophila cv lemon and lime.  The variegation is getting better, again I am not sure if direct sun or shade is best to bring it out.


I think that's enough for now, I'll do the aloes next time.

Tuesday, 23 May 2017

Experimenting with concrete planters

A few months back a video started making the rounds showing how to make concrete dragon eggs. You can watch the video Here.  The video used them as candle holders.  Being keen on experiments that weekend out came the plaster-of-paris and the balloons, yes sadly we have both lieing aroud the house. The plaster ones came out really easily with only minor modifications of havig to turn the eggs constantly for about 10 minutes then leaving for about 30 minutes.


A few more were made and have been put aside ready to invite one my newphews around to decorate.

While they would make excellent candle holders my first thought was always as planters, especially if the concrete worked.  So a trip to the hardware shop to buy some quick drying concrete and time to try my first concrete egg.  It looks so easy on the film: mix the concrete with water, pour into balloon, turn every two minutes for 2 hours.  I ended up with a lump of concrete.

Four attempts later


I have watched several different videos now and they all simply say, turn every two minutes. I don't know if I am usig different cement, but it just doesn't work for me.  Instead I have found shaking, then turning, then shaking, then turning. The reason for the shaking is that if the concrete hardens giving the ballon a good shake softens it again, giving you another go.

Tip: leave the eggs for at least 12 hours to harden before bursting the balloon.  Again after only 2 hours it was no where near enough, and even after 6 or 7 if the concrete was too thin, the egg just crumbled.

Now the big warning.  Do not do this inside, especially not in your best room, while sitting on your new furniture with you OH and the dog.  Yes sadly I do speak from experience and amazingly I am still married and alive!  We both wish we had taken a photos, as it went everywhere.  I'm not sure if you have ever tried bursting a balloon filled with water, but shaking and then looked at how far it spreds.  It is very effective, the carpet, walls, furniture, pets and us all covered.

So lesson learnt.  In fact I found puttting the ballon in a plastic bag saved a lot of mess should things go wrong when popping the ballon as well. 

Once you have the eggs, you can make holes.  Again the video makes it look easy, but make your egg too thin and the slightest pressure and they crumble.  I have a nice collection of concrete bits in a bin in the greenhouse.  My tip here would be to leave the egg for 24 hours to let it harden a bit more, and to check it over for cracks so you know the weak points.

Then you can reinforce it. This was probably the easiest bit, mix some vert liquick concrete mix, pour it into the egg and swivle it around to coat the inside. You do have to keep an eye on cracks don't be tempted to over do it the first time. It was better to do three layers, leaving the layers to dry between.  The first layer is the crucial one, especially while turning the egg as it's easy to crush it.


While doing all of this I tried adding different coloured powder to the concrete to colour the eggs.  The red looks great when wet, but is very pale dry.


Black probably has the most promise.  This was the last egg I tried and is the most sucesfull.  I learnt that blowing the ballon up and leaving it blown up until you are ready to pour the concrete in allows you to get more in and so to have thicker walls.


I am toying with differet ways to finish them.  The first few were soaked in water for a couple of weeks, changing the water every day.  This should help leach out some of the stuff plants do not like.  The other options are concrete sealer, and painting.

Then you can drill drainage holes and plant them up.


I've got a few more to plant up, I'll save them for another post.  I'm probably going to try a few differet plants for differet parts of the garden. They probably lend themselves more to the clump forming plants than the agaves, but I'll have to try one with an agave in. I think they would be great with a mound forming succulent flowing over the egg.

Now go away and try them for yourselves and show me how you would plant them up.

Friday, 7 August 2015

Time for a recount

There has been a fair amount of organising this summer; deciding which plants weren't working, duplicates and struggling plants.  Add this to the fact that many plants went into the succulent rockery and it's looking quite pot light around here.  So much so, for the first time ever I actually have an empty pot pile.


Recently there was a post on the Plant Lust blog (you can find it here) counting their pots and talking about what was a reasonable amount.  I commented that when we moved my niece counted the pots into the cars, or she started to and got bored at 400.  You can see the post on the house move here. So I promised a recount, and at the same time took some photos of them around the garden.

Starting with the vertical planting.


It looks a bit sparse at the moment, I had more on there but every time I watered they dripped onto each other which was not good, so this arrangement means I can water them without worrying.  There is more space to expand into.


Some of the posts still have their holders as well, as the plants go into to create more shade here they will be moved.


There are a few pots scattered around the rockery itself. These are usually where plants have flowered and died, or bulbs that are now dormant.


There are a few on the patio, and wall.


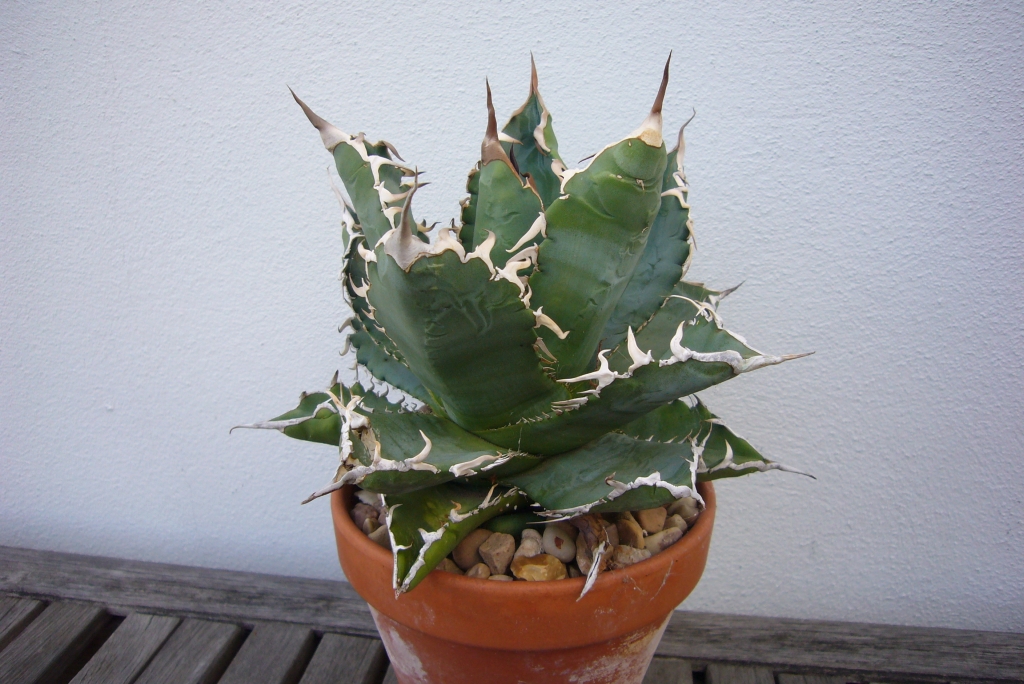
I have become more restrained here. To start with the wall was totally covered, now it's a few discrete groups. The agave stricta nana is one of my current favourite plants, the colour is amazing in the sun. Succulent fans are at a disadvantage as no matter how hard we try it seems impossible to resist propagating more plants. The little pots are all agave cream spike. 


There are an increasing number of troughs and planters appearing in the garden, these alpine ones are a bit out of the way to give them some shade during the hotter weather.


Looking at these photos, shows how much the garden is still in planting and sorting stage.  Most of these groups are in temporary positions, hopefully for the last year. I haven't been bothering with good groups or nice pots. That will change next year as the garden is now starting to look like a garden and not just a collection of pots.

So far it is not looking very good for my pot count, time to up the numbers.


There are two of these pot holding areas in the garden, these are considerable smaller now so many plants have gone into the rockeries.

The numbers are starting to look more respectable now. The green house helps considerably.


Now we are into much more respectable numbers. It does help that almost all my plants are small, so a lot can fit into a small space.  Which also partly explains the lack of good groupings and the more colourful pots you see else where.

Recently as you know I have been using nicer pots, although these are still small.  It did get me thinking that you start looking at everything as a possible pot.  I have two butlers sinks waiting to be planted once the gravel arrives for the front garden. Then you see things in shops;


I was tempted by these, could be fun watching how the metal ages. I have been looking for a pot for my variegated agave filifera group.

This fruit bowl was purchased last year with the idea of filling the frame with moss and planting into that.


The sad thing is I need to propagate more echeverias to fill it, which in turn is going to require more pots!

So what was the final count? 280, and another 60 plastic that are either in the prop area, or ready to be given away.  Still respectable, but a lot less than at it's peak.

I can see this becoming an annual event and a new meme over at Plant Lust.

Wednesday, 8 July 2015

Starting the annual pup cull.

Part of the re-potting process is removing offsets.  I used to keep every single one and pot them up for swaps, but noticed they took up space and often suffered if they were not moved on.  Now if the plant is nothing unusual I just take off very young pups (that way I don't feel so bad), as part of the re-potting process.  Today it was the turn of some of the agaves.

First up the un-identified agave filifera hybrid. There is still no formal id on this one, other than it came from a batch of a. filifera seeds.  It's a good solid plant.


The wierd thing about this plant, is that it doesn't seem to actually grow.  It gets new leaves, and old ones die, but it stays the same size. No offsets on this one, it never does, but it always needs a good clean up of the dead leaves. I have tried a slightly bigger pot this year in the hope of maybe getting some growth.

From the non-offsetter, to one of the biggest, agave stricta nana.  It was bought about 3 years ago at a local plant fair.  There was a group of them hidden away on one of the stall, all much bigger than you usually see in the UK.


This is a pupping machine, it's natural habit is to clump. Keeping it as a solitary plant is a full time job.  Thankfully it is not diffiuclt to remove offsets, a simple twist or pull on each one separates it form the mother.  I did save one, which has gone in one of my "victorian" pots.


Funnily enough the little pots came for the same fair as the nana did. A seller this year has a few of them, supposedly all victorian, and I have since seen them sold like that in another nursery, so maybe it's true. Either way they are cute little pots.  I have 5 of them and am playing with the idea of selecting my favourite plants for a series of miniatures.

There are two many plants to show each one, but the final one worth a spot is the manfreda maculosa x agave obscura.  This was from my friend before he died and I have been growing both forms to see how they turn out.  This more triangualar form is doing well.


The spots really come out in the sun.


It seems to offset freely, so took off quite a few and actually saved some of these.


These will make a few people very happy, there has been a waiting list for them so they are all off to good homes. You know who you are.

Friday, 12 June 2015

What's in the box?

Whenever a parcel turns up it is always fun, the un-wrapping and first view of the item.  Normally I am not too bothered by the wrapping but this one was different. What was in the box? Two more boxes:


It then started to rain, so a quick move inside to open the final layer. Only to find another two boxes, and I'm starting to get a feeling of deja-vu. This 5th box looks different, maybe this time:


Nope, another box. Have I got caught up in a game of pass the parcel. This one is must be the final one:


No more boxes, but more protection hiding the contents.


Finally the contents are revealed. That was some packing, 6 boxes is going above and beyond to ensure they get there in one piece.

So this set of pots came from the UK, a father and son team of potters called Erin Pottery.  They specialise in bonsai pots, and have a great set of pots on their website. It took me a while searching through to find ones that were a little deeper. I ended up with a few different forms to play with.


So going from the smallest to largest. One of my favourite miniature aloes, a. descoingsii var descoijngsii.


A very compact little plant and clumps up nice and quickly.  It has tiny pink flowers, which are on a massively long stem. I did try to photograph the whole thing, but had to get so far away you coudn't actually see the flowers. I can highly recomend this little plant to any aloe fan.

The next pot was perfect for one of the new agaves. A. albopilosa is a very recent discovery and up until this year has only really been available through seeds.


Mine were seed grown and this one is hopefully about to develop the tufts that made the categorisation as an agave controversial.  If you have not seen the photos of the adult plants, go and do a quick search they are lovely.  They are just starting to appear as plants for sale if you can't be bothered with seeds. The pot will give it plety of room to grow and should at least last it a couple of years.

The next pot is about the same size, but has a wavey edge which is lower on one side.  I think they are officially known as "freeform pots". It took a while to decide on what to plant it up with; a clumping plant that will flow over the edge or something more bonsai like. In the end it was one of my dudleyas, I think it is D. farinosa but the id has never been certain.


The plant is quite slow to get into growth after winter, so the jury is out as to whether this will work or not, it may be a little heavy for the pot. What do you think?

Finally the largest pot. Originally the dudleya was going to go in this one, but then thought of my crassula buddha's temple.


The flower seems to keep going, I have got used to it now and it doesn't look as wierd.

I am hopeful that some of these plants are going to turn into even better features pots over the summer. I may even be tempted to show a few of them if they develop nicely. At least the pots are up to show standards.

So still not pots for the two plants that need it.  Maybe in the next set. BUt my collection of hand made pots is growing rapidly.